Installing Software on Instances
An important part of managing instances is the installation of software. This page assumes you have a working instance and can SSH into it. This page assumes you are using an Ubuntu image.
We highly recommend building your research software stack into a Container. While there is a learning curve and some setup time, containers make replicating and sharing environments simpler. Everything you develop is packaged into a self-contained unit that can be run on virtually any modern Linux system.
A particular command sudo will be used extensively. Be warned that sudo grants any commands used administrator privileges. If you use sudo with untrustworthy software, you may be allowing an attacker to compromise your system.
Danger
The sudo command should be used carefully and judiciously, as it creates security risks. Use with caution.
Important
Much of the information and examples on this page require a working knowledge of terminal commands and the shell. If you are unfamiliar with the terminal then please see our Shell page for more information and educational resources.
Before Installing Software
Before installing software, good practice is updating and upgrading operating system packages. For some software this is required. These updates often include critical security and bug fixes. To update the instance operating system, enter the following at the command line.
Installing Software
Most common software packages and NVIDIA drivers are available as apt packages. Some packages are available using custom installers. Be sure the website and installer author are trustworthy before installing!
Finding Packages
- Try using Google to locate the name of the package with something like
ubuntu apt <keywords> - Try using https://packages.ubuntu.com
- Try
apt-cache search <keyword> - Ask Support for help
Installing Packages
If the software is available via apt then use sudo apt install <package>. An example would be sudo apt install git to install git software.
If the software uses a custom installer, then follow the instructions provided by the software's documentation. An example would be Miniconda, where a shell script is downloaded and then executed using bash installer.sh.
Installing Server Software
If you wish to set up server software, you'll need to open ports for that software by creating Security Groups. Then you may want to test the ports are open and verify your software is listening. It is highly recommended to verify the ports are configured properly and remotely accessible before you spend time setting up and configuring the server software.
Testing Server Ports
If you intend to use your instance as a server host, you'll likely need to set up additional Security Groups for any ports the server expects to communicate on. It can be helpful to verify that those ports are open before configuring the server software. Assuming you know which ports are needed, the simplest way to do this is outlined below.
- Set up Security Groups for the ports your server will need to communicate on.
- SSH into the instance.
- Prepare the
netcatsoftware commandnc:- For Ubuntu, the command
ncshould already be available. - For other OSes, you may need to Install
ncornetcat.
- For Ubuntu, the command
-
For one of your
<port>of interest, start a TCP listener withnc -l <port>. -
Open a new terminal on your local machine.
-
Probe the
<port>:-
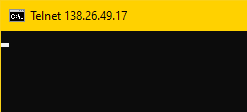
Using the Windows command prompt:
- Enter the command
telnet <floating-ip> <port>. -
If the terminal window goes blank, then the connection was successful.
Otherwise you will see a message like
Could not open connection to the host.
-
To exit
telnetpress Ctrl+], then typeq, then press Enter.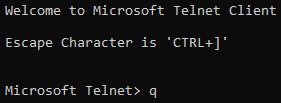
- Enter the command
-
Using any Linux-based prompt, MacOS, or Git Bash on Windows:
- Ensure
ncis installed locally. - Enter the command
nc -nvz <floating-ip> <port>.nuses numeric output, which minimizes unhelpful warnings about hostname lookups. It is also faster.vuses verbose output, i.e., print the output we care about.zscans for listeners on the remote.
-
If the connection is successful you should see something close to the following, with
<floating-ip>and<port>replaced by the values you supplied earlier.
If the connection is unsuccessful you will see
Connection refusedinstead ofopen.
- Ensure
-
Now you should have more information on whether your VM port configuration was successful. Feel free to repeat the steps above for each port, as needed.
Verify Server Software Is Listening
Once you have the server set up, you can check which processes are listening on which ports using the following command.
The program is ss for "socket statistics", which can display information linking ports and processes. The flags are
ldisplays only listening socketsnuses numeric output, which minimizes unhelpful warnings about hostname lookups. It is also faster.pshows which process is using each socket.tdisplays tcp sockets.udisplays udp sockets.
An example of the output is shown below. The most useful columns for us are Local Address:Port, to verify they match the configured Security Group ports, and Process, to verify the server software is listening on the correct ports.

Common Examples
Below are a few examples of installing certain common softwares that may be useful to scientific applications. We are not able to provide diagnostic or troubleshooting support for installation of any software. If you believe these instructions are outdated or in error, please reach out and let us know.
Installing NVIDIA Drivers
- Run the commands in Before Installing Software.
sudo apt install ubuntu-drivers-commonubuntu-drivers devices- Find the line with "recommended" and install the package on that line with
sudo apt install nvidia-driver-### - Reboot the instance
Installing Miniconda
Miniconda is a lightweight version of Anaconda. While Anaconda's base environment comes with Python, the Scipy stack, and other common packages pre-installed, Miniconda comes with no packages installed. This is an excellent alternative to the full Anaconda installation for environments where minimal space is available or where setup time is important. We recommend installing Miniconda on cloud.rc instances, as opposed to Anaconda, to conserve storage space. For more information on how to use Anaconda see the Using Anaconda. Need some hands-on experience, you can find instructions on how to install PyTorch and TensorFlow using Anaconda in this tutorial.
- Run the commands in Before Installing Software.
wget https://repo.anaconda.com/miniconda/Miniconda3-latest-Linux-x86_64.shbash Miniconda3-latest-Linux-x86_64.sh
Installing Singularity
Follow the instructions located at https://docs.sylabs.io/guides/3.9/user-guide/quick_start.html#install-system-dependencies under "Debian-based systems".
- Run the commands in Before Installing Software.
-
Run the following
-
Install Go language using the following
export VERSION=1.17.2 OS=linux ARCH=amd64 && \ # Replace the values as needed wget https://dl.google.com/go/go$VERSION.$OS-$ARCH.tar.gz && \ # Downloads the required Go package sudo tar -C /usr/local -xzvf go$VERSION.$OS-$ARCH.tar.gz && \ # Extracts the archive rm go$VERSION.$OS-$ARCH.tar.gz # Deletes the ``tar`` file echo 'export PATH=/usr/local/go/bin:$PATH' >> ~/.bashrc && \ source ~/.bashrc -
Download SingularityCE
-
Compile SingularityCE
Note
For other versions of the Singularity documentation, visit https://sylabs.io/docs/.
Installing Jupyter Server
Jupyter Notebooks are a staple of modern research computing, especially when developing new workflows or evaluating the usefulness of software packages.
The setup process for cloud.rc is more involved than for Cheaha.
To install, you will need the following pre-requisites. If you are unfamiliar with the terminology or new to cloud.rc, it is highly recommended to first start with our Introduction and follow the tutorial completely.
- Run the commands in Before Installing Software.
- A Cloud Instance with attached [Floating IP]network_setup_basic.md#floating-ips).
- A Security Group for the intended Jupyter Server port. For the purposes of this tutorial, the port will be set to
9999. - Miniconda installed on the instance. Miniconda is a lightweight version of Anaconda.
Once the prerequisites are complete, the following steps must be performed to install and setup Jupyter Notebook Server. It is highly recommended to build an Anaconda Environment using a reproducible Environment File. The steps below belong to the official Jupyter documentation available at https://jupyter-server.readthedocs.io/en/stable/operators/public-server.html.
Warning
Leaving your Jupyter Notebook Server unsecured may mean that other people on the UAB Campus Network are able to access your notebooks and other files stored on that cloud instance.
-
Install Jupyter Notebook Server using Miniconda. You will need the following packages.
conda-forgechannelnotebooknb_conda_kernels- [Optional]
jupyter_contrib_nbextensions
anacondachannelipykernelfor python usersr-irkernelfor R users- [Optional]
pip
-
Because floating IPs are, by default, reachable by anyone on the UAB Campus Network, you'll need to secure the server using the steps below.
- Generate a notebook config file using
jupyter notebook --generate-config. [official docs] - Prepare a password using
jupyter notebook password. [official docs] -
Set up SSL for an encrypted connection. For now create a self-signed certificate using the following command. [official docs]
Warning
When you connect to your Jupyter Server, your browser will warn you that the connection may be insecure. This is because self-signed certificates are not trusted by your operating system's root certificates. It is possible to fix this with some additional work using notes at the official docs. Generally the security warning can be bypassed without issue in this case.
- Generate a notebook config file using
-
Configure the notebook server by locating lines like the following in
~/.jupyter/jupyter_notebook_config.pyand updating them with the right-hand side of each variable assignment (equals sign=). This file was created as part of the first step of these instructions. [official docs]Note
If you used
jupyter notebook passwordthe hashed password will be located injupyter_notebook_config.jsoninstead of.py.Note
The lines below may not appear together depending on the version of Jupyter installed. The file
jupyter_notebook_config.pycontains over a thousand lines. You may need to search using a text editor search or find feature. If you are usingnanoplease visit our nano page to learn how to search.c.NotebookApp.certfile = u'/absolute/path/to/your/certificate/mycert.pem' c.NotebookApp.keyfile = u'/absolute/path/to/your/certificate/mykey.key' c.NotebookApp.ip = '*' c.NotebookApp.password = u'sha1:bcd259ccf...<your hashed password here>' c.NotebookApp.open_browser = False # It is a good idea to set a known, fixed port for server access c.NotebookApp.port = 9999 -
Start the server with
jupyter notebook. - Access the server with the browser on your local machine by navigating to
https://<floating-ip>:<port>. In this case the port was set to be9999, and<floating-ip>comes from the prerequisites for this section. The port must match that used for the security group to allow traffic between your local machine and the cloud instance. You must also be on the UAB Campus VPN.
Important
Some browsers may default to using http instead of https when given a raw IP address. Make sure to fully type out https://<floating-ip>:<port>.